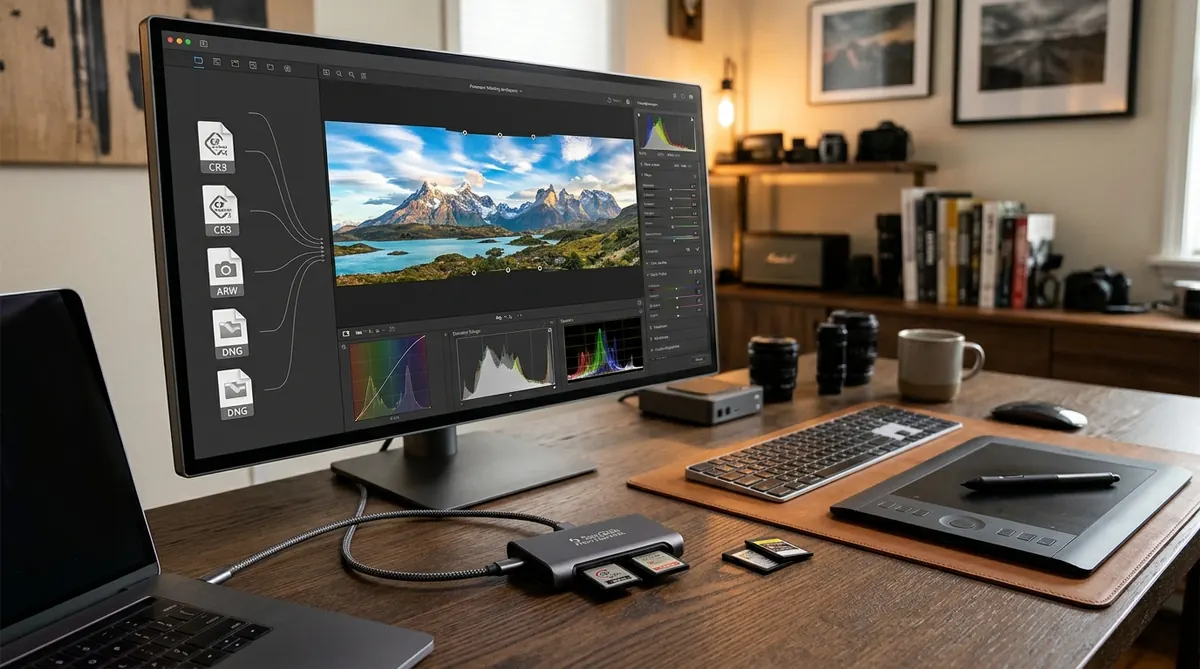
The Direct Answer: Autopano Giga 4.4.2 was released in September 2018 with an embedded build of LibRaw v0.18, meaning it cannot natively decode modern post-2018 camera RAW formats—such as Canon .CR3, Sony Lossless Compressed .ARW, Nikon High-Efficiency .NEF, or Fuji compressed .RAF. Dragging these files into Autopano results in instant “File format not supported” errors or corrupted magenta/green thumbnails. The verified professional solution is to batch-convert your RAWs to 16-bit uncompressed or LZW TIFFs (using Adobe Lightroom Classic or the free Adobe DNG Converter) prior to stitching, preserving 100% of your sensor’s dynamic range and color latitude.
| Camera Brand / Format | Example Models | Direct Drag & Drop Status | Recommended 2026 Solution |
|---|---|---|---|
| Canon .CR3 (CRX Container) | EOS R5, R6, R8, R3, R5 II | ❌ Fails (Unsupported format) | 16-bit TIFF or DNG Converter |
| Sony Lossless Compressed .ARW | A7 IV, A7R V, A1, A9 III | ❌ Pink/green corruption | 16-bit TIFF via Lightroom / C1 |
| Nikon High-Efficiency .NEF | Z8, Z9, Z6 III, Zf | ❌ Fails (TicoRAW codec) | 16-bit TIFF or native PTGui Pro |
| Fujifilm X-Trans Lossless .RAF | X-T5, X-H2, GFX 100 II | ❌ Incomplete demosaic | Lightroom Enhanced TIFF |
| Legacy Uncompressed RAWs (Pre-2018) | Canon 5D IV (.CR2), Nikon D850, Sony A7R III | ✓ Supported natively | Native import (TIFF still better) |
Why Modern Camera RAW Files Fail or Display Pink Casts in Autopano Giga
Autopano Giga does not contain its own proprietary sensor color pipeline; instead, Kolor bundled a modified open-source LibRaw / dcraw library to parse RAW sensor matrices into RGB pixels. When GoPro ceased development of Kolor in September 2018, this library was permanently frozen at LibRaw v0.18.
Since 2019, every major camera manufacturer has fundamentally overhauled its RAW architecture:
- Canon shifted from TIFF-based CR2 to CR3: CR3 is built upon the ISO Base Media File Format (QuickTime/MP4 container structure). Autopano’s parser does not even recognize the container file header.
- Sony introduced Lossless Compressed RAW: Older decoders attempt to unpack these files using legacy uncompressed lookup tables, resulting in severe neon-magenta color casts across the highlights.
- Nikon adopted intoPIX TicoRAW compression: High Efficiency (HE and HE*) NEF files rely on proprietary wavelet compression that requires modern licensed decoders.
Even if you shoot older pre-2018 cameras (like a Canon 5D Mark III or Nikon D810) whose raw files load into Autopano, stitching uncalibrated RAW files directly is bad photographic practice. Autopano’s 2018 demosaicing engine lacks modern lens profile vignette corrections, chromatic aberration defringing, and Adobe Camera Raw’s superior highlight reconstruction algorithms. Pre-converting ensures vastly cleaner stitches.
Method 1 — The Lossless 16-Bit TIFF Workflow via Lightroom Classic or Capture One
This is the gold-standard production pipeline used by commercial architectural and landscape panorama photographers. It gives you modern color science while feeding Autopano Giga 100% compatible raster data.
- Import & Select Panorama Set: In Lightroom’s Library module, select all frames belonging to your panoramic sequence (e.g., frames 1 through 16).
- Synchronize Lens Corrections First: Switch to the Develop module. Under Lens Corrections, check Remove Chromatic Aberration and Enable Profile Corrections. Press Ctrl + Shift + S (or Cmd + Shift + S) and synchronize these two adjustments across all selected frames. This completely eliminates dark vignette bands in sky stitches!
- Lock Exposure & White Balance: Ensure Exposure, Highlights, Shadows, and White Balance (Kelvin) are strictly identical across every image in the set.
- Open the Export Dialog: Press Ctrl + Shift + E (Cmd + Shift + E on Mac). Configure the following critical settings:
- Image Format: Select
TIFF. - Compression: Choose
ZIPorLZW(lossless compression saves 30–40% disk space with zero image degradation). - Color Space: Select
ProPhoto RGB(for maximum color gamut) orAdobe RGB (1998). - Bit Depth: Select
16 bits/component. (Never select 8 bits, which causes severe posterization in sky gradients).
- Image Format: Select
- Import into Autopano Giga: Drag the exported 16-bit TIFF folder directly into Autopano Giga. Click Detect. The images will align with flawless color fidelity, zero color casts, and complete EXIF focal-length preservation!
Method 2 — The 100% Free Conversion Workflow Using Adobe DNG Converter
If you do not subscribe to Adobe Creative Cloud or Capture One, you can convert your files using Adobe’s official standalone utility: Adobe DNG Converter (100% free for Windows and macOS, updated continuously with every new camera release).
- Download and install the latest version of Adobe DNG Converter from Adobe’s official support site.
- Place your Canon CR3, Sony ARW, or Nikon NEF files into an input folder.
- Open Adobe DNG Converter. Under Step 1, select your input folder.
- Click Change Preferences. Under Compatibility, select Custom > DNG 1.4 and check Linear (demosaiced). (This bakes camera raw demosaicing into standard uncompressed DNG containers that Autopano’s LibRaw can easily interpret).
- Click Convert. The batch will compile in seconds. Drag the converted DNG files directly into Autopano Giga.
Method 3 — Native RAW Stitching with 32-Bit Linear DNG Export via PTGui Pro
If you shoot commercial virtual tours or landscape panoramas on a daily basis, generating 40 to 80 GB of intermediate 16-bit TIFF files for every shooting bracket clogs up your SSD and adds 15 minutes of export waiting time per panorama.
This is where upgrading to PTGui Pro 13 revolutionizes your workflow:
- Zero Pre-Conversion Required: Drag native Canon CR3, Sony Lossless ARW, and Nikon Z8/Z9 NEF brackets straight from your SD card into PTGui Pro.
- Hardware Accelerated Demosaicing: Decodes and aligns modern camera sensors using Apple Metal (Apple Silicon M1–M4) or OpenCL (NVIDIA RTX / AMD Radeon).
- Stitches Directly to a Stitched DNG RAW: PTGui compiles the entire panorama into a single 32-bit floating point DNG file. You open this master DNG back in Lightroom Classic, and you have full raw highlight recovery, shadow boosting, and white balance sliders intact!
Crucial Pre-Stitching Lens Corrections and Color Management Rules
To guarantee that your converted 16-bit TIFFs stitch into a gallery-worthy masterpiece without visible seam artifacts, adhere to these three core color science rules:
- Color Space Selection (ProPhoto RGB vs Adobe RGB): If your destination is commercial print or extensive color grading, export your TIFFs in ProPhoto RGB (which encompasses 100% of camera sensor color gamut). If your final output is strictly for web virtual tours, export in Adobe RGB (1998) to avoid clipping during downstream conversion. Never export 8-bit sRGB TIFFs, as color stretch during blending causes posterization.
- Vignette Removal is Non-Negotiable: Optical light falloff causes adjacent frames to have bright centers and dark corners. If you stitch without correcting vignetting in Lightroom first, Autopano’s exposure fusion engine will attempt to balance these gradients, producing unnatural dark vertical columns in blue skies.
- Preserve EXIF Metadata: When exporting from Lightroom or Capture One, ensure the Metadata export setting is set to All Metadata. Autopano Giga reads the embedded lens focal length, 35mm equivalent crop factor, and lens model to calculate accurate initial projection matrices.
Frequently Asked Questions (FAQ)
Does converting RAW to 16-bit TIFF result in any quality loss?
No visual quality is lost. A 16-bit TIFF in ProPhoto RGB preserves 65,536 tonal levels per color channel (far exceeding the 14-bit or 16-bit raw data captured by camera sensors). In fact, demosaicing with Lightroom’s modern algorithms provides cleaner noise reduction and sharper fine details than Autopano’s outdated LibRaw engine could ever produce.
Why do some converted DNG files still fail in Autopano Giga?
If you use Adobe DNG Converter with default settings, it saves files using modern DNG 1.6 specifications. In DNG Converter preferences, you must set Compatibility to DNG 1.4 and choose Linear (demosaiced) so Autopano’s legacy LibRaw engine can interpret the image stream.
Can Autopano Giga output a raw file after stitching?
No. Autopano Giga can export to 16-bit TIFF, Photoshop PSD/PSB, JPEG, or Radiance HDR (.hdr / .exr), but it cannot output a native RAW DNG file. If you require stitched 32-bit linear DNG output for Lightroom color grading, PTGui Pro 13 is the only professional panorama stitcher with native DNG export capabilities.
What should I do if my 16-bit TIFF panorama crashes during rendering?
Large 16-bit multi-row panoramas easily exceed 2GB in memory, which triggers crashes on high-core CPUs. In Autopano Giga, open Edit > Preferences > General, cap CPU cores to 6 or 8, and select Photoshop PSB as your output container. See our complete fix in the Multi-Core CPU Troubleshooting Guide.
Continue Your Panoramic Masterclass
Now that your modern camera RAWs are converted to lossless 16-bit TIFFs, master the stitching process in Autopano or resolve common stitching issues.